Break and Retest Trading Strategy
Step onto ice that just cracked under your last footstep and you do not immediately sprint across the pond. You test the crack again, right where it happened, to see whether it holds your weight now or gives way completely. Price does something similar after it breaks through a level. The break proves the ice is thinner than it looked. What happens next, when price steps on that exact same spot again, tells you whether it is actually safe to keep going.

When Break and Retest Makes Sense
A break and retest strategy confirmation is not something you get the moment price punches through a level, it is something you wait for. Price breaks a level, support or resistance, and instead of chasing that first move, the whole point is to sit still and watch what happens when price comes back to test the exact spot where the ice just cracked. The goal was never to catch every breakout, just the ones that prove themselves on a second visit.
Open a free demo account and watch real breakouts and retests unfold, using virtual funds.
Try Demo AccountCurious what a real breakout and retest actually looks like once it is unfolding candle by candle? Reading the sequence in theory only goes so far. Watching price actually break a level, drift back, and either hold or fail teaches the pattern faster than any description can.
Open a demo trading account and watch a few real breakouts play out, with virtual funds and nothing real on the line.
How the Breakout and Retest Sequence Works
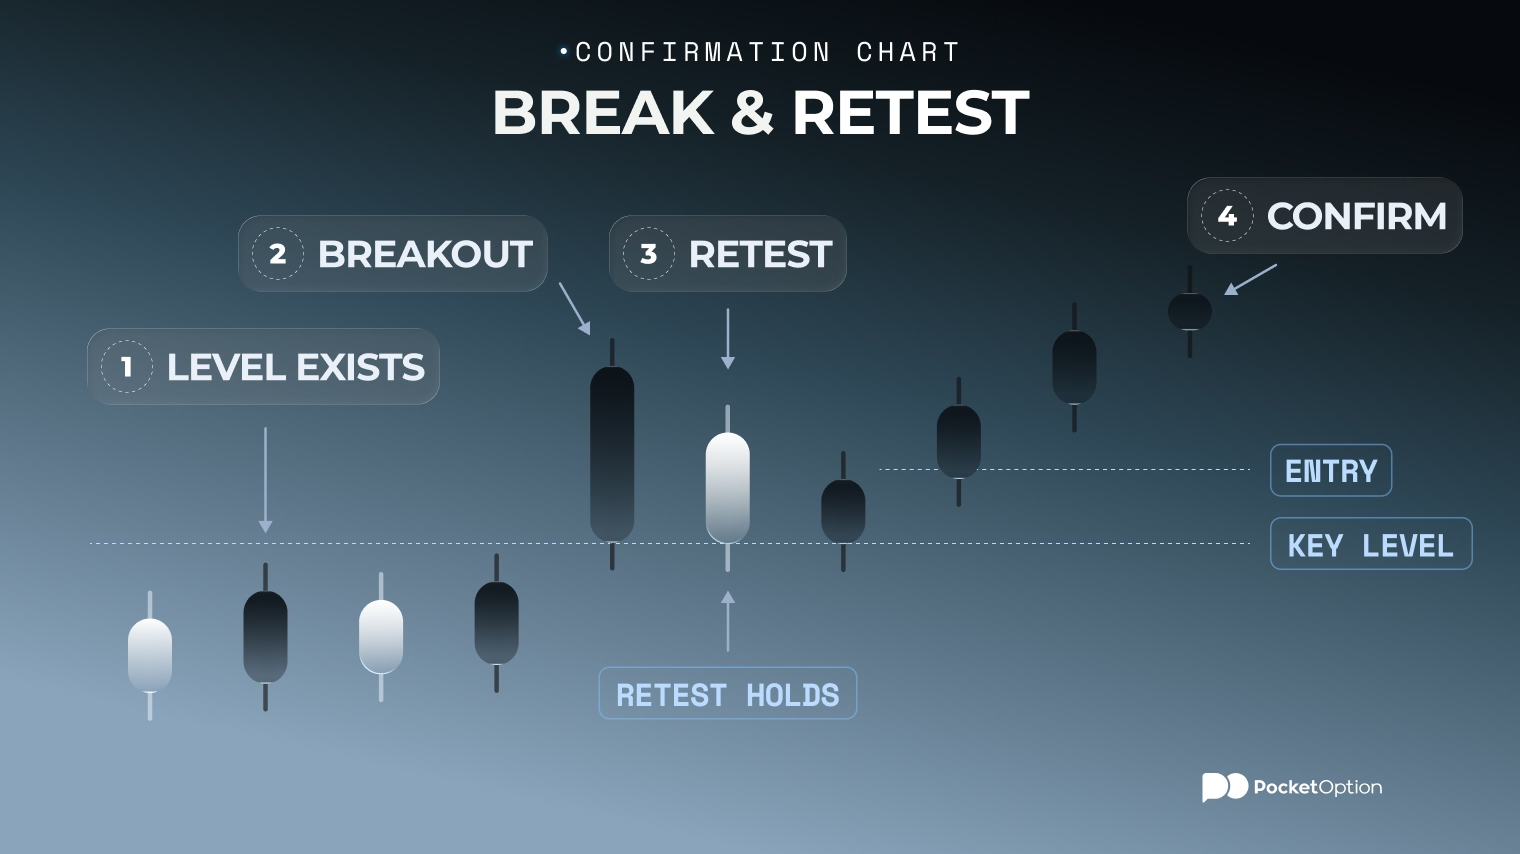
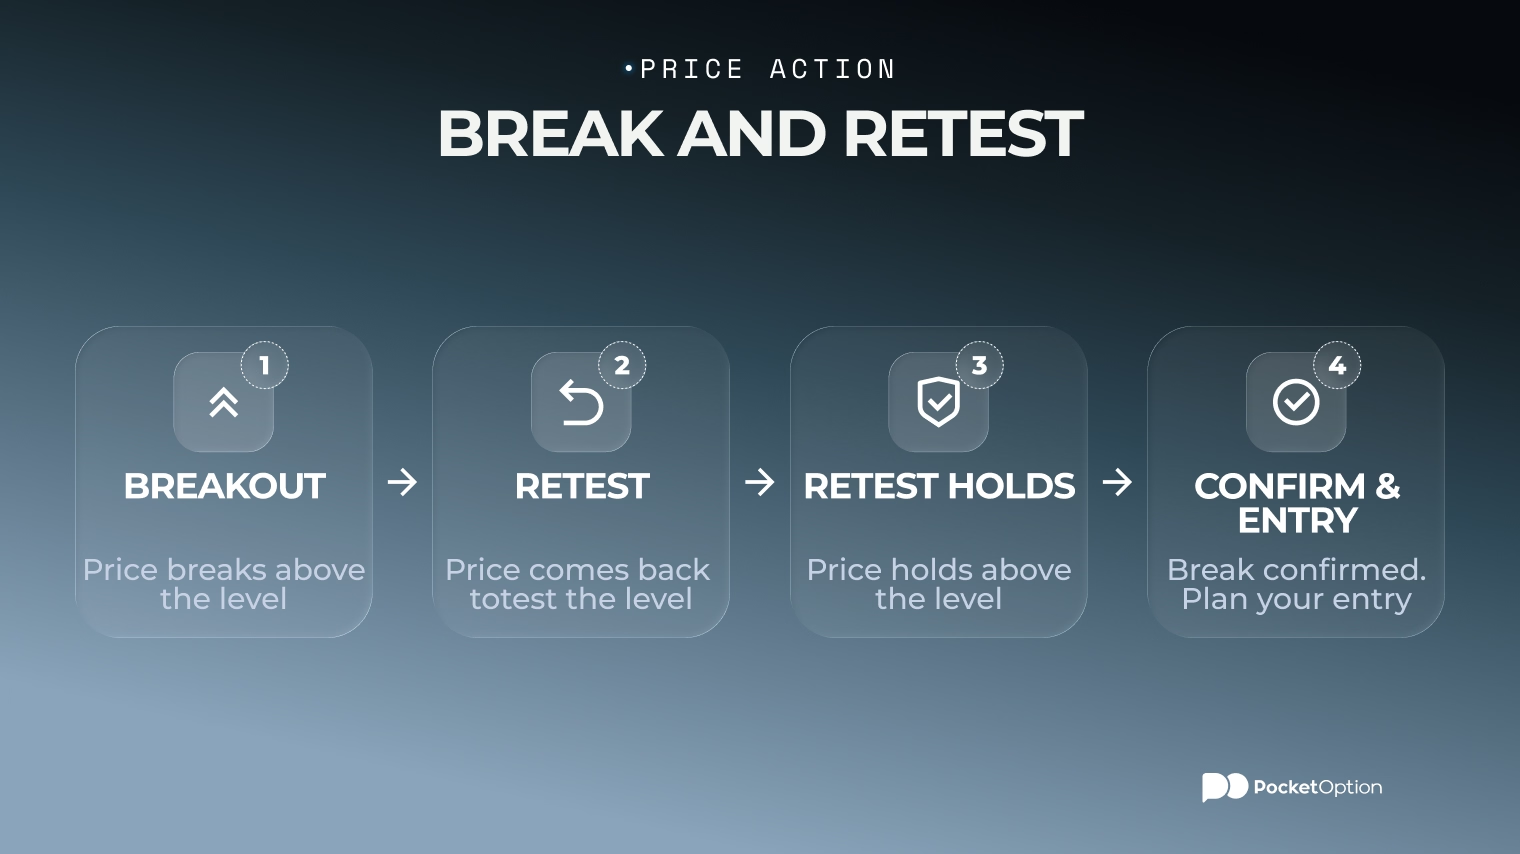
The sequence runs in a specific order, and skipping a step is where most trouble starts. First, an actual level exists, one other traders have clearly respected before. Second, price breaks through it, closing beyond the level rather than poking through with a wick. Third, price comes back and retests that level from the other side. Fourth, that retest either holds, confirming the break, or fails, sending price back where it came from. Only after that fourth step does an entry plan for a break and retest strategy actually make sense.
Skip straight from step two to a trade and there is no retest at all, just a breakout bet with a different name. A break and retest strategy specifically waits through step three, which separates it from chasing every level that gets touched. Seeing that fourth step confirm or fail in real time is where any break and retest strategy really clicks, and the pocket option tutorial is a reasonable place to warm up on chart basics if any of this still feels new.
What Counts as a Clean Retest
A clean retest looks a specific way. Price approaches the broken level, slows rather than slicing straight through, and reacts, a rejection wick, a candle closing back in the direction of the break, sometimes a small pickup in volume. None of these signals alone guarantees anything. A break and retest trading strategy built on just one of them is weaker than one that waits for two or three to line up together. Holding the zone for more than a candle or two after adds further confidence the level actually means something now.
Market context matters just as much as the candle itself. A break and retest trading strategy applied against a powerful underlying trend behaves differently than the same setup appearing after a long, quiet consolidation. The candles can look identical and still carry very different odds.
When the Retest Signal Looks Weak
Not every return to a broken level deserves the name retest. Price can drift back too deep, well past the level, which looks less like a test and more like the breakout failing outright. It can return with no reaction at all, sliding through without so much as a pause, suggesting the level never really mattered. It can snap back into the old range almost immediately, faster than any genuine test would allow. Any break and retest trading strategy explained honestly admits these weak versions happen constantly, and spotting them early saves a trade that was never going to work.
Planning Entry, Stop Loss and Target
Plan the whole trade before the retest even happens, not while it is unfolding. Mark the retest zone around the broken level in advance. Decide what confirmation you actually need to see, a candle close, a rejection wick, whatever your own criteria are, before price gets there. Set the invalidation level, the point where a failed retest proves the whole idea wrong, and place the stop just beyond it. The target sits at the next meaningful level beyond the retest zone, not at some arbitrary distance.
Say resistance at 1.2000 gets broken and closes at 1.2015. Price drifts back toward 1.2005, slows, and prints a small rejection wick right at the old resistance, now acting as support. An entry near 1.2010 might pair with a stop around 1.1985 and a target near 1.2080, the next visible level above. Risk sits near 25 pips, potential reward near 70. None of this promises the trade works, it just frames the risk before committing. A break and retest trading strategy cryptocurrency version of this same logic usually means widening every number, since crypto levels get tested with far more violence than most forex pairs ever see.
Entering on the Breakout vs Waiting for Retest
Two traders can watch the exact same breakout and take completely different approaches, and neither one is simply wrong.
Approach | Entry Timing | Main Advantage | Main Drawback |
|---|---|---|---|
Breakout entry | Right as the level breaks | Catches the move earliest, before it runs | Higher exposure to a false breakout reversing fast |
Retest entry | After price returns and confirms | More confirmation, often a tighter, cleaner stop | Price sometimes never comes back to retest at all |
False Breakouts and Failed Retests
Price can do everything right and still fail. It breaks the level, drifts back for a textbook-looking retest, then keeps drifting straight through the old range instead of bouncing. Warning signs show up before the failure is obvious: a weak, half-hearted reaction instead of a clean rejection, a sharp plunge back into the range rather than a controlled drift, thin volume, or a news event that changes the whole context mid-setup.
How This Setup Works Across Markets
None of this belongs to one corner of the market. Forex pairs break and retest key levels constantly, often around session opens. Stocks and indices do the same around earnings or major levels. Crypto shows the pattern too, just faster and rougher, since volatility there can turn a calm retest into a sharp spike that barely pauses before continuing.
Common Break and Retest Mistakes
The same handful of errors shows up again and again.
Entering the instant price touches the old level again, without waiting for any actual confirmation.
Chasing the entry too late, well after a big candle has already made most of the move.
Ignoring a false breakout and treating a failed retest as just a slow one.
Setting a stop so tight that a normal wick at the retest zone knocks you out before the real move starts.
Entering with no clear target, then guessing about an exit once the trade is already open.
Trading the setup against a powerful trend or major news, where the context overrides the pattern.
Forcing the setup onto a level that was never actually significant to begin with.
Risks Before Trading a Retest
A retest can simply fail, and it rarely announces itself in advance. Price can snap back past the level fast enough that a stop gets hit before there is time to react. A false breakout followed by a failed retest is one of the more common ways this setup loses money. High volatility can turn execution messy, filling a stop or entry at a worse price than planned, and leverage magnifies every one of these outcomes rather than fixing any of them.
Risk Disclaimer: Trading involves significant risk of capital loss. This article is for educational purposes only and does not constitute financial advice. Always conduct independent research and consider your risk tolerance before making any trading decisions.
See more:InterestingTrading Strategies